Dear New Friend,
Here at Storybook Farm, we raise our animals with love and care. We want their transition to your farm to be the best possible one for you and them. Many of our buyers are new to goats, or have limited experience. We offer this page as a description of the management that your new goat has been used to so that you can help him/her to transition as gradually and safely as possible.
We know that all farms differ in their biological ecology and management practices. In presenting this information, we in no way mandate that you follow our practices, but we do ask that you consider them as normative for your new animal, and recognize that goats do best when introduced to changes gradually, over the course of a week or two at least.
Gathering Supplies and Readying Housing
Basic Supplies
This is the most brief list that I can devise. There are many other helpful tools to build or buy, but these are the “must haves” on Day 1 of the arrival of your new animals. I have linked to our favorite sources for these items so that you can see pictures and perhaps purchase them. (We do NOT have affiliate links here.)
FOR ALL GOATS
- Hay. It should not be dusty or moldy. Most common (best) forms are orchard/timothy mix, brome, and alfalfa. Goats need hay (or pasture or both) available 24/7. It is what keeps their rumens operating well, and you goat will arrive stressed from the journey.
- A manger from which they can feed, since they will not eat off the ground, and will trample it, and lay in it, if it’s not in a manger or other container. Goats waste hay from slatted mangers, and if they are poorly designed, they will jump in them and potentially hang themselves in too-large slatted openings. We experimented quite a bit with mangers.
- We highly recommend our manger design, linked here and here. It is quick and inexpensive to build, and you’ll thank me later for saving you so much hay! Follow the vertical dimensions exactly! Allow 2′ of length of the manger per adult goat.
- Water bucket. Some goats have a color preference (weirdly). We have blue, green, and black water buckets, and there are times when ours won’t touch a certain colored bucket, and I’ve had this happen to customers. If you newcomer won’t drink for you after a day, try a different container. I prefer the flat-backed kind of bucket.
- Mineral dish. Mount it on the wall in such a way that the goat has to step up on something — like a cinder block — to access it. You will put loose minerals (see below) in this dish every few days as needed. We get ours at Tractor Supply Company (TSC): linked here.
- A muck bucket, and mucking tools. We use soft-sided muck buckets found at TSC, taking advantage of their colors to code how we use them. Pink means “clean enough to eat from” for waste hay, and to use as a temporary manger. Black means “poop goes here,” etc. We use this tool (link) and this one (link) to clean up our floors, which are rubber horse mats. Goats poop pellets (when healthy) so pitchforks don’t help much there, but they are useful for hay pitching. Some use brooms and/or leaf rakes for mucking.
- Hoof Trimmers. See below in this article.
- Dog collar and lead shank. Your new arrival may or may not arrive with one. If not, we use them on all our goats for easy handling, especially when new to the farm. (This is a matter of personal preference, as some people feel that there’s a danger of goats getting hung on collars when in the woods. We have woods, and have never had an issue.) Goats have smaller-than-you think necks. A 14″ collar is about right for an adult. We don’t put them on babies staying with their dams, but if you’re buying a kid, you may want to collar them. A regular dog leash is more suitable than a horse’s lead shank.
FOR LACTATING DOES
If you are bringing home a doe in milk, you will need the following additional supplies:
- A milking stand. See this article about ours. They are very easy to build!
- Advice: we made ours out of 2×4 and 2×3 materials. Lighter is better, since you’ll probably need to move them around.
- Stain or paint will make them last longer, but beware of slipper floor surfaces (like rubber or paint) on the stand’s floor. Bare wood or wire mesh is better.
- And the distance between the two sides of the headstalls is only 4-5″! (We made ours too wide at first, and they got their heads out easily.)
- Our milking stands are only about 12″ tall. You can make them taller, but you’ll need a lower platform or a ramp for your does to get up onto them, especially when they are heavily pregnant or immediately postpartum.
- A feed dish for the milking stand — one for each goat is easiest, but you can get just one. (Link)
- Feed for your goat: she should be milked at 12-hour intervals, AM and PM. We send bags of our feed with our goats; please consult us as to the feed/minerals you should purchase for an easy transition.
Basic Housing
You will need to provide a rain-proof, draft free (but WELL VENTILATED) shelter for your goat that is as cool in summers and warm in winters as can be. It needs some basic features:
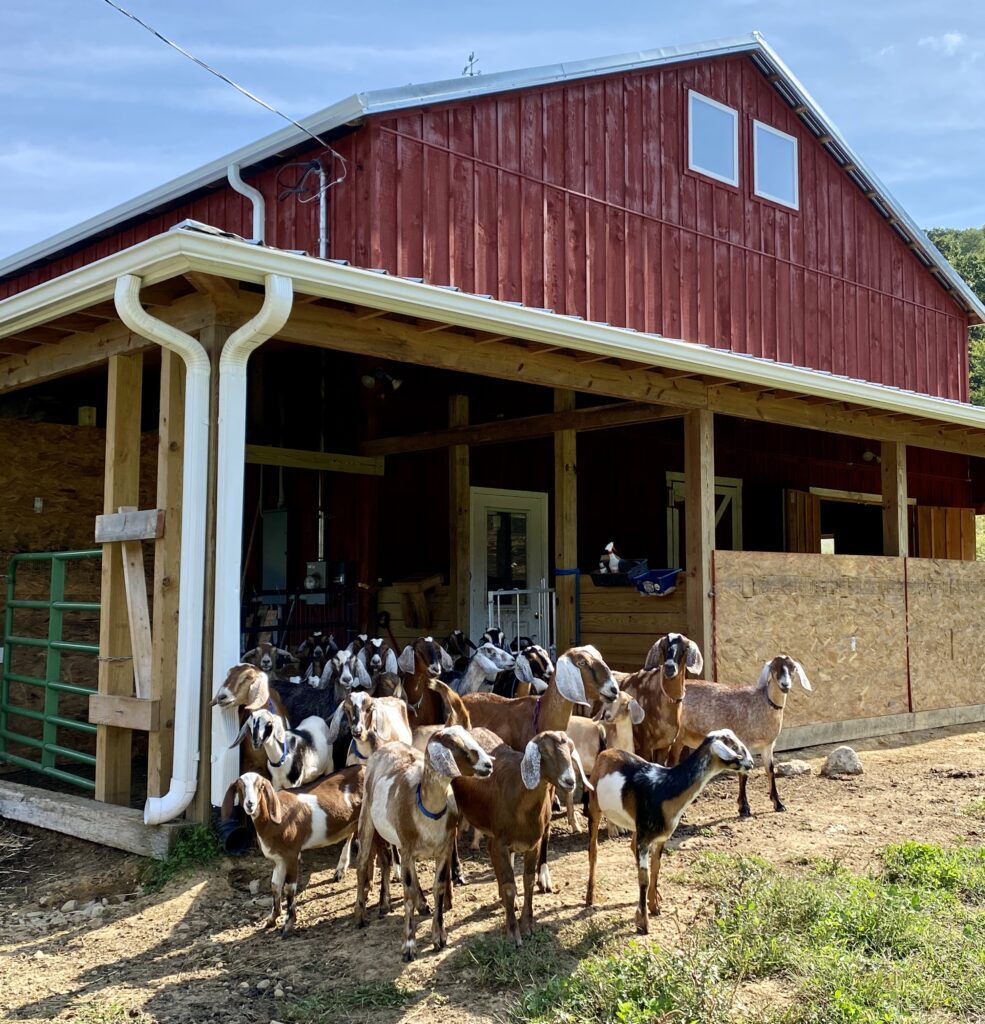
- Goats are desert animals and do not do well in rain, so your shelter should be accessible to the goats 24/7 in case it should rain. (If you’re “leaving the door open” be sure there’s a catch on the door that keeps it open!) A deluxe design includes a “goat porch” where the animals can eat/sleep/lounge in the shade, or on rainy days be outside. Here is a picture of ours on our big barn: goat porch.
- The best basic flooring options are:
- Dirt with a light bedding (waste hay works well; steer away from straw. If using shavings, large flake shavings are better than the fine ones). Spread any bedding very lightly as you will muck it up daily. Goats don’t need cushy bedding; they need it to absorb pee and keep them out of the poo at nights.
- Wood covered with horse mats (or it will rot eventually) and then bedding.
- Gravel covered with horse mats, and then bedding
- Draft-free is at their level; ventilation is up higher. Obviously, your climate makes a big difference for housing design. In northern climates, goats will need protection from the cold, so windows that have shutters or that can close are a good idea.
- Don’t forget light! You and the goats will need sunlight to find your way around in the goat shed. Some people put up motion sensor lights. If you do this, make sure that the goats themselves (at their height and in their sleeping areas) don’t trip them on and off. It will disturb them at night. Make the sensor pick up for you, but not them.
- Goat sheds should be large enough for the herd you project to have. Two adult females or males can comfortably share a space that is about 10-feet square (100 sf) for sleeping, but you’ll want more than that for the manger to be put in as well, and consider how big your herd will eventually be. For instance, if you’re kidding, the barn space will need to be temporarily partitioned. We love modular arrangements, so if you are rehabbing or building, knock down most barriers and plan to use temporary ones. See this article on our website, and this one as well.
- The space need not be tall, but make it tall enough that you, the human, can easily stand up in it for mucking and doctoring (and kidding) purposes.
- This article about our buck shed shows arrangements that could easily become a starter space for two does and two bucks (separated by the middle space. (Scroll down for the floor plan.) Outside, their doors lead to separate pens. There are also really great Facebook groups that focus on goat housing ideas.
You’ll need a fenced-in area for your animals, even if they are on “dry lot” –meaning, you have no browse or grass for them to graze so you need to provide hay 24/7. If they are to be on dry lot, or if you haven’t quite gotten to fencing a larger area of your property, they can get along with quite a small area at first — perhaps, a 20′ x 20′ outdoor space that’s adjacent to their shelter and water and hay. Fashion it so that they can come in and go out at will. If you don’t have trees, they will need to get into their shed for shade as well as water.
- We recommend welded wire: 4″ openings, 4 foot tall. Tractor supply sells this as sheep and goat wire (link) supported by wooden posts OR green stakes.
- Make it tight to the ground, or block up lower openings if your ground is uneven. Goats — especially kids — love to go under wire. We have had very few jumpers among our Mini Nubians.
After Arrival: Be Prepared!
You should be mainly concerned with four things during the first weeks of transition:
- Worm blooms
- Dietary changes
- New germs (quarantine)
- Temperature changes
Worm Blooms: A Serious Threat
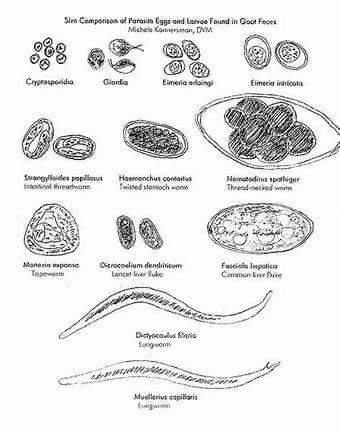
In our county, the most effective worm medicines available have been Cydectin (pour on, administered orally) and Valbazin, but we are starting to see resistance to these, even with double dosing. For non-pregnant goats, we are now using Prohibit, and also rotating fields more often. Because travel and transition are stressful for goats, we highly recommend that, about a week after your new goat arrives, you take a fecal sample to your vet or lab and have it tested for worms so that you know whether the dose that we gave before s/he left was effective, or whether you might need to re-treat your new animal. Worms can be deadly to your goats, and if your new animal sheds a new kind of worm than the ones currently in your environment, your existing herd will be affected as well.
It is a GREAT idea to learn to do fecal tests yourself. If you would like more information on how to do this, please click HERE. I have an 8-minute video that shows me doing fecal tests, plus links to all the resources you’ll need to get started. While there is an initial investment in equipment, you will save both time and money if you do your own fecal tests.
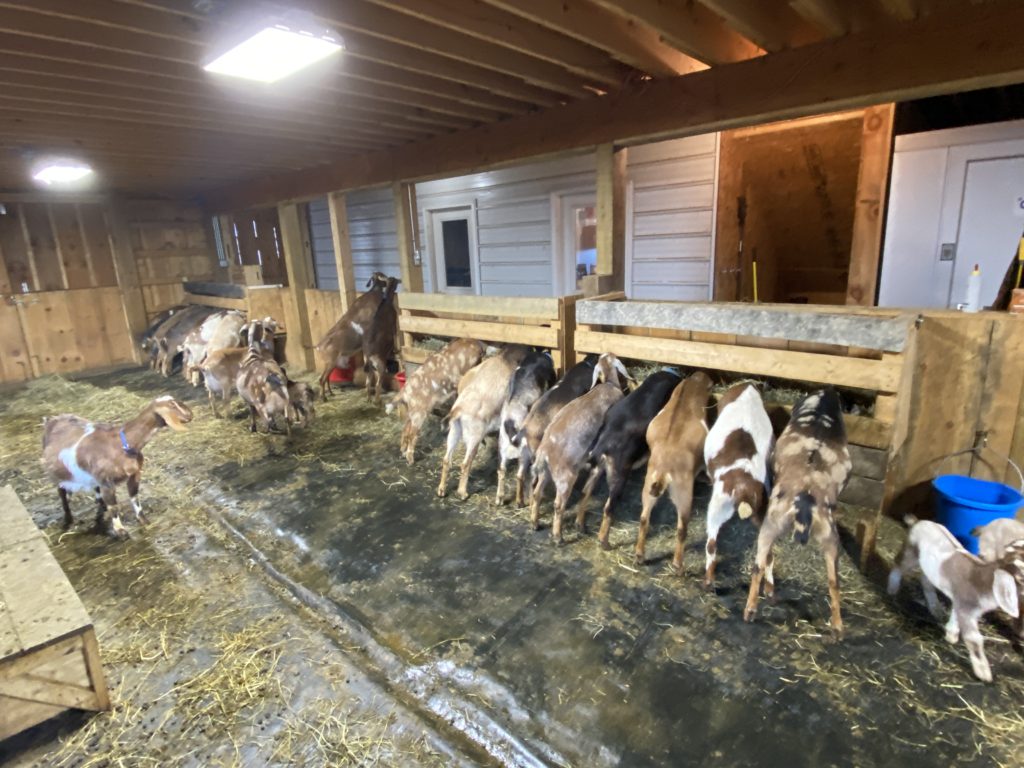
Our management is to feed a small amount of hay (about one leaf per 3 goats) in the morning first thing, and then to let goats out on pasture only after the sun has risen to burn off the morning dew or frost (typically around 10:30 AM in warmer months). This practice means that there are fewer worm larvae on taller browse for browsing goats to ingest. We feel that this management has greatly reduced the worm load in our goats, and it is the practice to which our young and older does, especially, are accustomed.
Dietary Changes
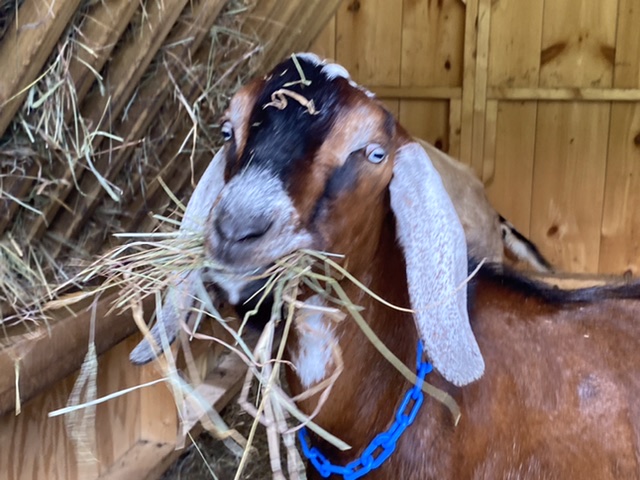
If the goat that you are buying from us has been on hay/pasture only (typical of boys or young does who have not yet given birth) then be aware that your new goat may not readily accept new hay/forage. We normally give a B12 shot as they leave, to help stimulate appetite, and we send some of our hay along with your new goat, but you’ll need to be watching to make sure that your new goat is eating the forage that you’re offering.
Similarly with grain. We send a gallon bag of grain along with does who are lactating at the time of purchase. We recommend that over the week following transport, you mix a bit of your new feed into a majority of our feed the first day, then move to 25/75% new, then 50/50%, then 75/25% and finally to 100% new feed over the course of about a week. Our feed formula is oats:barley:BOSS (black oil sunflower seeds) in a ratio of 2:2:1/4 parts. Our lactating does get 2 cups grain and 1 cup alfalfa pellets, and at some times we offer beet shreds and whole corn as well. If we have picky eaters, we mix in some goat pellets, too.
We use SweetLix Meat Maker goat minerals for bucks or confined does, and also a free choice (20 mineral) mineral bar for our larger doe herd. Minerals are less problematic to change, but do be watchful that your new goat is actually consuming the loose minerals that you offer. If they are not, switch brands until you find one that they will eat.
New Germs (Quarantine)
For sure, our goats will carry different germs than will your existing herd. I’m talking about colds here, not grave illnesses, since we have a tested, clean herd for those. We do not ship obviously ill animals, but stress brings out germs that may have been hidden. It is wise practice to isolate a new animal for at least a week so you can observe any runny noses or coughs.
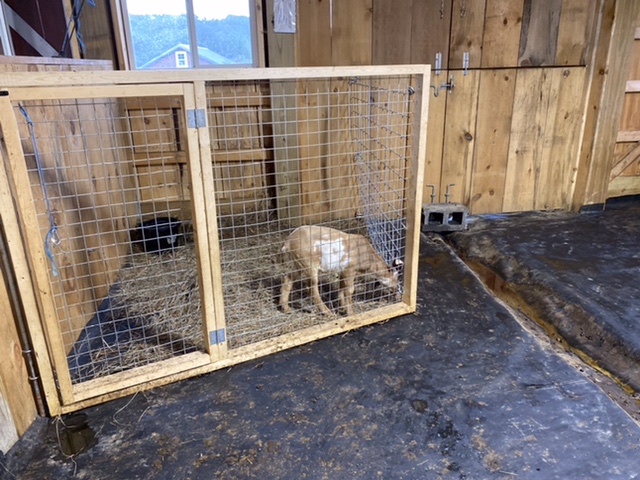
This is a challenge on many farms because of the need for separated housing/fencing. Many don’t practice quarantine, also, because goats are herd animals and buyers feel that they are adding to the stress of the transported goat by isolating them. For this reason, it’s often a good idea to buy at least two animals from a farm at the same time.
Regardless of whether or not you do separate them, just know that you should be on the lookout for runny noses, coughs, etc., and have a vet handy if you see any signs of illness in your new goat (because s/he caught it from your herd) or your existing herd (because they caught it from her/him).
Temperature Changes

We often send goats to very different environments, weather-wise. Please be aware of this. Here in WV, we live in the mountains and have a lovely tight, warm barn. Our goats are not raised in excessively hot conditions during warm months, and they are well protected during cold months. If your newly arrived goat will experience a drastic change with regards to climate, it is a good idea to “baby” her or him a bit until she/he acclimates (think coat thickness differences, for instance: you might look to see them grow a winter coat or you might clip a coat in hot weather).
Especially for Newbies
Do contact a vet who treats goats at your earliest opportunity, ideally before you bring your new goat home. You will need one eventually, so you should make sure that your new animal can be treated as an established patient. A good way to establish your new goat with your vet is by taking in a fecal sample about a week after s/he arrives to make sure that there has not been a worm bloom.
Vets are busy people, so we also recommend that you find a local goat mentor, or, failing that, an online goat mentor. This person should have been keeping goats for at least a few years, and ideally been through 2-3 kidding seasons. It doesn’t matter if she keeps the same breed that you do; goats are goats when it comes to management. When your first kidding season comes, you may be very glad indeed that you took the time to build a relationship with a local mentor!
Always make sure that your water and mineral dishes remain clean and free of any feces. Be aware that hooves in dishes put feces there as often as the goats’ bottoms do! Mineral dishes, especially, can spread coccidia if goats put their hooves into them when accessing them. We find that mounting them higher than standing nose level and providing a step up (like a cinder block) cuts down on contamination.
After you detect worm blooms and treat your animals, it is necessary to re-check by fecal test to confirm that your treatment was effective. Do not assume that worms are dead just because you have treated with medications. Wait 5-7 days and then do another fecal sample test.
Worms and Parasites: You should try to test your herd for worms every 1-2 months until you have established a good, effective regimen and know what you’re up against, worm wise. If you are concerned about the expense of testing, explore investing in a two-eyed microscope with a moveable stage and some McMasters slides and learn to do your own. This is really not hard and gives you immediate information when animals are doing poorly, plus the microscope will be paid for in most small herds within a year. Here’s a very helpful website to explore and learn more about testing for worms: https://web.uri.edu/wp-content/uploads/sites/241/McMaster-Test_Final3.pdf. There are videos on this procedure on this website that are worth watching as you begin.
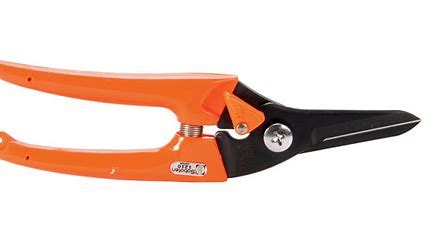
Hooves: You will need a good pair of hoof-trimming shears. Goats need their hooves trimmed every 6-8 weeks, depending on your terrain and management. There are helpful YouTube videos on how to properly trim goats’ hooves. Our favorite trimmer of all time is this one: Zenport-Q91-Zen-Magic-Trimming-Twin-Blade. (Note specifically the orange lock switch; this is how you know that you have this best of trimmers!)
Pregnancy: If one of our bucks has serviced your doe before transport, you can verify pregnancy via a blood test at about 28 days post breeding. The kids should arrive approximately 145 days after they are serviced. We do the following for prenatal care for our girls, just FYI:
- 5 weeks before due date, a shot of BOSe
- 4 weeks before due date, CDT booster shot
- 3 weeks before due date, we start giving Vitamin E capsules (1000 iu), a pinch of red raspberry leaves, and a handful of grain daily
- 2 weeks before due date, we give another BOSe shot, continued E, red raspberry leaves, and grain up to delivery
Finally, we are always here for you! If you have questions feel free to reach out by email or FB Messenger.
- Our email is storybook.farm.wv@gmail.com
- Though I have a farm page on FB, I much more regularly access my personal account. I am Marcia Somerville, and you’ll see a picture of two goats snuggling.
- There are many helpful articles on our blog about goat housing, kidding, manger design, and more that I have written over the years. Find those at www.storybookfarmwv.com/blog
